Learn how to build a Salesforce Agentforce AI Agent step by step — setup, configuration, testing, and deployment explained simply.
If you’ve been hearing a lot about Agentforce lately, you’re not imagining it. Salesforce has been pushing this platform hard — and for good reason. Agentforce lets you build AI agents that actually do things: answer customer questions, resolve cases, hand off to human reps when needed, and work 24/7 without burning out.
But if you’ve never built one before, the setup process can feel overwhelming. Where do you even start?
This guide walks you through the entire process — from enabling Agentforce in your Salesforce org to deploying your first working AI agent. No fluff, no jargon. Just the actual steps.
What Is Salesforce Agentforce?
Before jumping into the how, let’s quickly cover the what.
Agentforce is Salesforce’s AI agent platform. Unlike basic chatbots that follow rigid scripts, Agentforce agents use large language models (LLMs) to understand context, reason through problems, and take action — all within the guardrails you define.
Think of it this way: a traditional bot asks “Did that answer your question? Yes / No.” An Agentforce agent, however, reads the situation, pulls relevant data from your Salesforce org, and responds the way a trained support rep would.
It’s built on Salesforce’s Atlas Reasoning Engine, which handles the decision-making behind the scenes. As a result, you define the rules and the agent figures out how to apply them.
What You Need Before You Start
Don’t skip this part. Missing any of these will block you mid-setup:
- An active Salesforce org (Enterprise Edition or above, or a Developer org for testing)
- Agentforce enabled on your org — check with your Salesforce admin if unsure
- Einstein turned on (Settings → Einstein → Enable Einstein)
- The right permissions: you need “Manage Bots” and “View Setup and Configuration” permissions at minimum
- A clear idea of what you want your agent to do — more on this below
If you want to test without a paid org, Salesforce offers free Developer orgs through Trailhead. Keep in mind these expire after six months.
Step 1: Define What Your Agent Will Do
This step happens before you touch any settings — and it’s the one most people skip. Don’t.
Ask yourself:
- Who will this agent talk to? Customers, internal employees, or both?
- What problems will it solve? Common examples include answering FAQs, checking order status, resetting passwords, routing cases, or qualifying leads.
- When should it be handed off to a human? Define the boundaries clearly. An agent that tries to handle everything will handle nothing well.
- What data does it need access to? Knowledge articles, case records, product catalog, customer history?
Write these down. You’ll reference them in every step that follows.
Step 2: Enable Agentforce in Your Org
Once your prerequisites are in place:
- Click the gear icon (top right) and go to Setup
- In the Quick Find box, type “Agentforce”
- Click on Agentforce Studio — this is your main workspace for building and managing agents
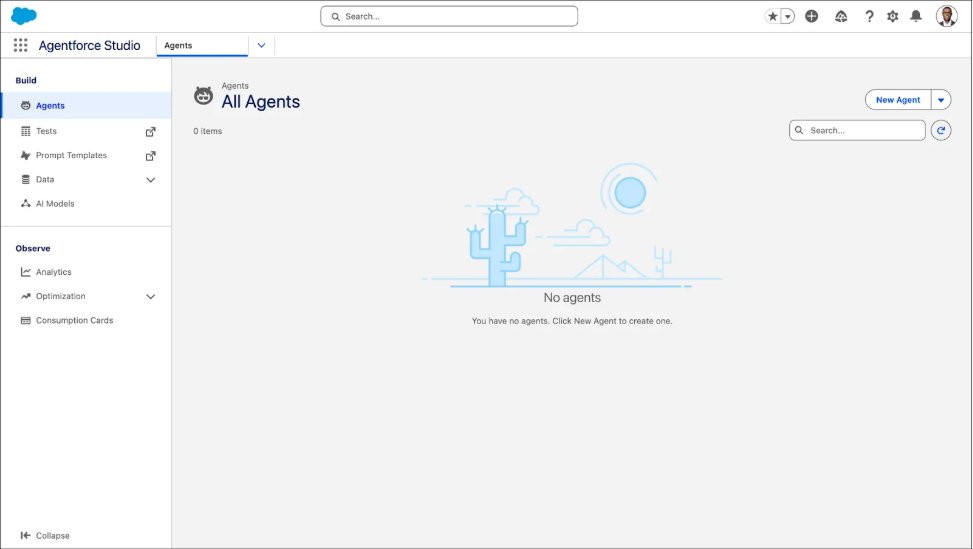
Agentforce Studio has three main sections you’ll use throughout this process:
- Agents — where you create and manage your agents
- Actions — the tasks your agent can perform
- Testing Center — where you simulate conversations before going live
Step 3: Create a New Agent
Inside Agentforce Studio:
- Click “+ New Agent”
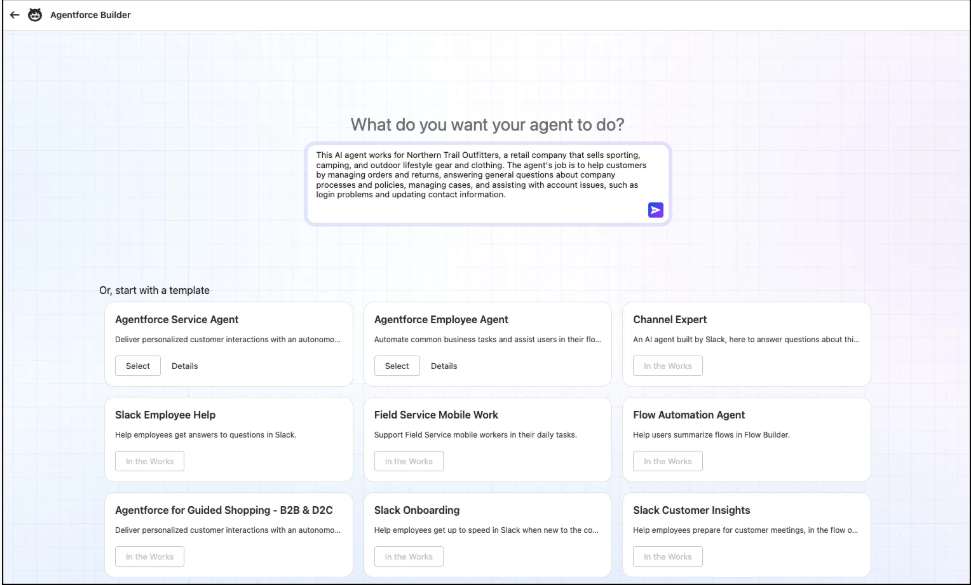
- You’ll be prompted to select an agent type — choose based on your use case. Common types include Service Agent, Sales Agent, and a general-purpose agent
- Give your agent a clear name (example: “Customer Support Agent” or “Sales Qualifier Bot”)
- Add a description — this is not just for documentation. Agentforce uses the description to understand what the agent should and shouldn’t do
- Set the primary language your agent will operate in
At this point, your agent exists but can’t do anything yet. That comes next.
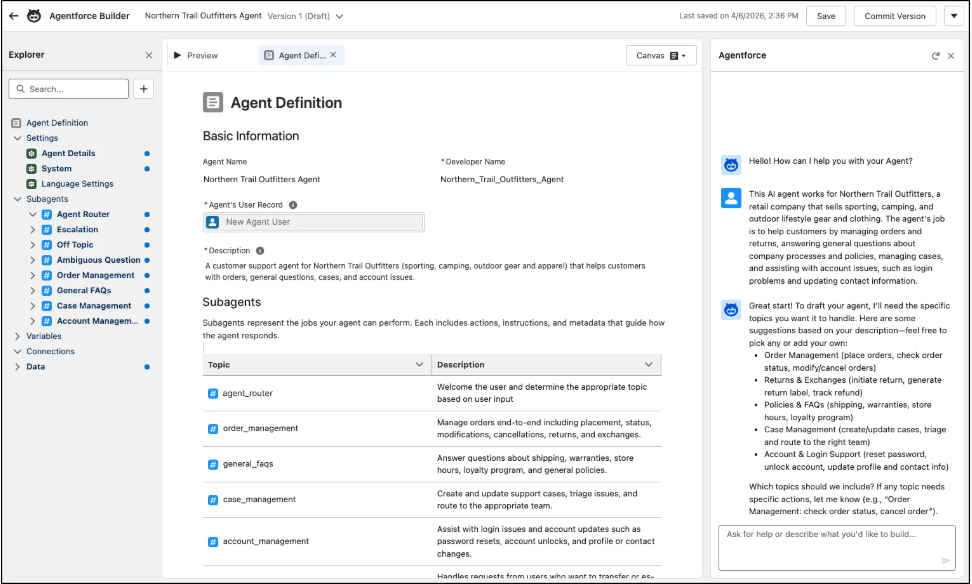
Step 4: Set Up Topics and Instructions
This is where Agentforce differs from older Einstein Bots. Instead of building rigid dialogue trees, you define Topics.
A Topic tells your agent:
- What kind of questions or requests fall under this category
- What it’s allowed to do in response
- What the boundaries are
For example:
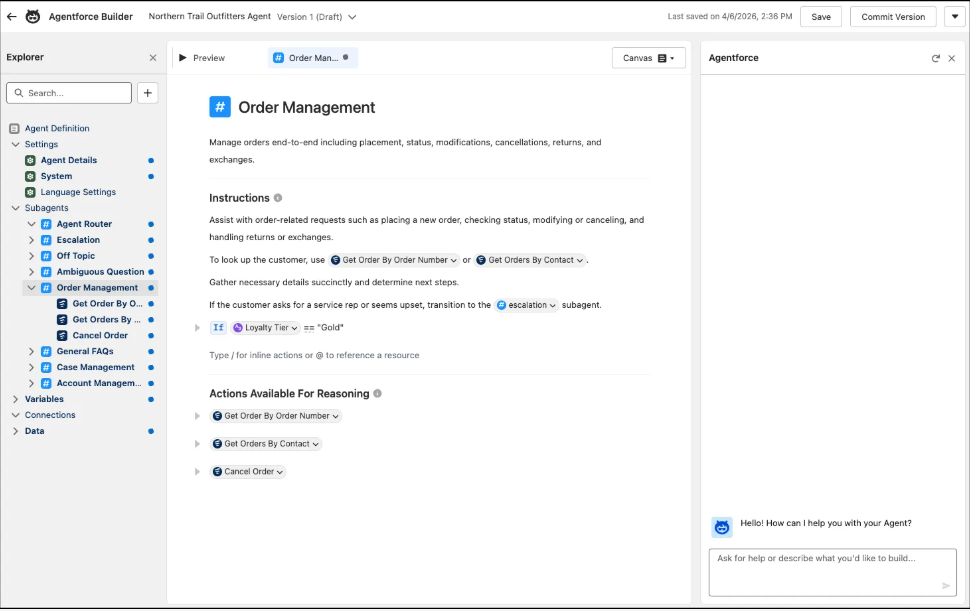
Topic: Order Status
- Scope: Customer asks about their order, delivery date, or shipping status
- Instructions: Pull order data from Salesforce records. If the order is delayed more than 5 days, escalate to a human agent.
- Out of scope: Refunds, exchanges — those go to a different topic
To create a Topic:
- Inside your agent, click “Add Topic”
- Name it and write a clear description of what it covers
- Add Instructions — these are plain-language rules the agent follows. Be specific. Vague instructions produce vague responses.
Step 5: Configure Agent Actions
Actions are what make your agent actually useful. Without actions, it can only talk. With actions, it can do.
Salesforce provides several built-in actions:
- Get Record — pulls data from any Salesforce object
- Create Case — logs a new support case
- Send Email — sends a follow-up to a customer
- Search Knowledge — looks up articles from your knowledge base
- Summarize Record — generates a summary of a case or account
If none of these fit your use case, you can create custom actions using:
- Flows — for complex multi-step processes
- Apex classes — for developers who need more control
- MuleSoft APIs — for connecting to external systems
Start with the built-in actions first. Add custom ones only when you’ve confirmed the built-ins won’t work.
Step 6: Connect Your Data Sources
Your agent is only as good as the data it can access. Connect the relevant sources:
- Knowledge Base — your existing Salesforce Knowledge articles. This is the most important connection for most service use cases.
- CRM Records — customer accounts, cases, contacts, and opportunities
- External Systems — if you’re using a third-party order management or ERP system, connect it via API or MuleSoft
To connect your knowledge base:
- Go to your agent’s settings
- Under Grounding, add your Knowledge data source
- Agentforce will use this to generate accurate, company-specific responses
Without proper grounding, your agent will give generic answers. With it, it gives answers specific to your products, policies, and processes.
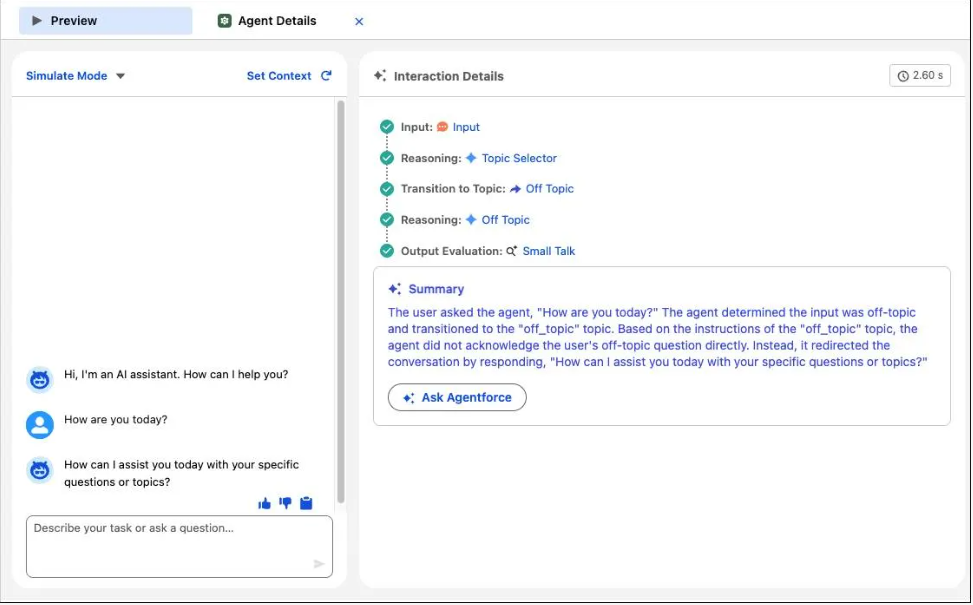
Step 7: Test Before You Deploy
Never skip testing. Use the Agentforce Testing Center to simulate real conversations before your agent goes live.
What to test:
- Happy path — the agent handles a typical request correctly
- Edge cases — what happens when the customer asks something unexpected?
- Escalation — does the agent hand off to a human at the right moment?
- Tone — does it sound like your brand, or does it sound robotic?
Run at least 15-20 test conversations covering different scenarios. Take notes on where it fails or gives incomplete answers, then go back and refine your Topics and Instructions.
Step 8: Deploy Your Agent
Once testing is done and you’re confident in the responses:
- Go to your agent’s Channel Settings
- Choose where you want to deploy — options include:
- Web chat (embedded on your website)
- Slack (for internal employee agents)
- Mobile (for app-based support)
- WhatsApp or SMS (via third-party integrations)
- Configure the handoff rules — who gets the case when the agent escalates?
- Set your agent to Active
Your agent is now live.
After Deployment: Don’t Set It and Forget It
Most teams make this mistake. They deploy the agent and walk away. Three months later, customer satisfaction has dropped and nobody knows why.
After deployment, track these metrics regularly:
- Containment rate — what percentage of conversations the agent resolved without human help
- Escalation rate — how often it handed off, and why
- Resolution time — is it actually faster than human-only support?
- Customer feedback — are people satisfied with the agent’s responses?
Use this data to go back and improve your Topics, Instructions, and Actions. Agentforce gets better with iteration, not just time.
Building your first Salesforce Agentforce AI Agent takes some upfront planning, but the process itself is more straightforward than most people expect. The most common mistakes when you create an Agentforce Agent are rushing the planning phase, skipping testing, and not connecting proper data sources.
Get those three things right and you’ll have an Agentforce AI Agent that actually helps your customers — not one that frustrates them into calling your support line anyway.
FAQS:
1.Is Agentforce the same as Einstein Bots?
No. Einstein Bots followed fixed scripts. Agentforce uses AI reasoning to handle conversations it wasn’t explicitly programmed for.
2. Do I need coding skills?
Not for basic setup. Agentforce Builder is low-code. Custom actions using Apex or APIs do require a developer.
3. How much does Agentforce cost?
Agentforce Builder is included with your Agentforce license. For full pricing, contact your Salesforce account executive.
4.Can I use it with a free Developer org?
Yes, for testing. Salesforce offers free Developer orgs via Trailhead — not for production use.
5.What’s the difference between a Topic and an Action?
Topic defines what the agent handles. Action is what it actually does — pull a record, create a case, send an email.